The past year and a half has been challenging for all students across the globe. When the COVID-19 pandemic hit, students had to pivot into learning models and roles they had never before experienced. With these changes came anxiety, nervousness, and even sometimes disconnect.
As teachers work to rebuild their classrooms into a more familiar learning environment, not only are academics highly important in this current school year, but so are building relationships and having fun. Below are several fun science experiments for kids that are engaging, exciting, and just in time for Halloween.
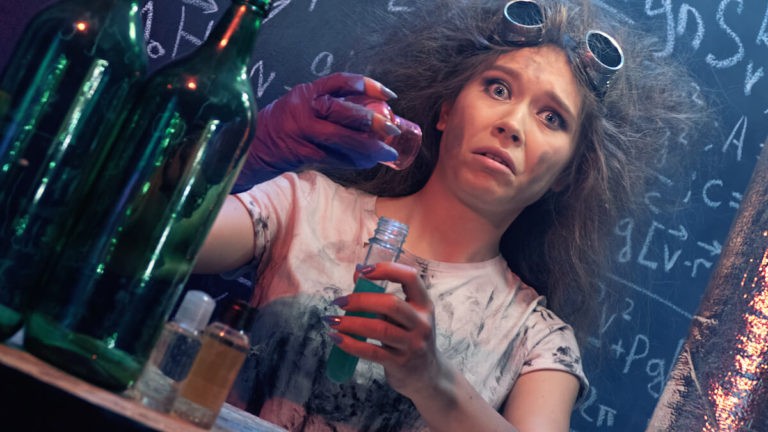
Create Your Own Monster
When it comes to physics, work is defined as a force causing the movement of an object. In day-to-day life, work happens constantly. A student carrying their books and setting them on their locker shelf, weightlifting, shooting a basketball, or pushing a shopping cart, are all examples of work. For work to be able to occur, a force has to be exerted onto an object so that that object can move.
If a student is having explosive behavior in the hallway and trying to push a wall, that would not be considered work because the wall is not going to move. But if the upset student throws his book across the hall, that would be considered work because the boy’s force along with gravity causes the book to fall down.
This Halloween activity explores both engineering and physics and is a perfect, creative science experiment for middle school during this time of year. Put students’ physics and engineering skills to the test by having them design and create a monster using items from your STEAM supplies or items brought in from home. This experiment can also be adjusted to be done online, or remotely, with the items students have at home, and by uploading pictures of their monster, or showing it off on Zoom, etc. The criteria for the student’s monster (which can be adapted to your choosing) are that it must be able to have movement, work, in some way.
Create other requirements for students such as the monster must include a cupcake liner, beads, googly eyes, or pipe cleaners. Rate the monsters based on best design, best physics monster that showcased work, and most spooky. The options for creativity are endless, and students are sure to love this hands-on, uncanny, science activity.
Do You Want to See My Blood?
The sight of blood may either make you squeamish or fascinate you. And this time of year, blood comes to mind more often with the entrance of vampires, goblins, and other spooky creatures. In this activity, students will learn what the components of blood are. They will observe how blood looks different under a microscope than under their eye.
Supplies needed:
- Microscope (a few per class is ideal, though this is also optional)
- Liquid corn starch
- Red food coloring
- Styrofoam balls (white and enough so each group has several)
- Straight erasers or an equivalent object (enough so each group has several)
- Clear glue
- Petri dishes (enough for each partner group)
Begin by mixing together slime using your favorite recipe or by following these steps. First, mix four ounces of glue, three ounces of water, and a few drops of food coloring into a container. Add four ounces liquid corn starch and stir until mixed. After stirring for about two minutes, the liquid should no longer be separated, and the slime should be coming together as fully bonded. Let the slime sit for two minutes so that it gels, then stretch and knead the slime with your fingers for another few minutes. This ensures that the stickiness is gone and helps you be able to pull the slime farther when manipulating it.
After creating your slime base for your blood model, mix in several Styrofoam balls (both red and white). Sprinkle the erasers, or other straight objects, on top. Place mixture in a petri dish for some added dramatization. Then, ask students to identify what is representing the red blood cells, the white blood cells, the platelets, and the plasma. Finally, if available, have students observe their blood underneath a microscope as they reflect on what scientists may be looking for when they observe blood samples.
Pumpkin Volcano
What better way to explore chemical reactions than by using Fall’s favorite produce: the pumpkin? In this experiment students will be given a small pumpkin. They should cut the top off (or do this ahead of time for them) and hollow out the inside. Then, place vinegar, liquid dish soap, food coloring (optional), and baking soda in front of each group. Ask them to make a prediction about what will happen when they combine these ingredients together inside the pumpkin. Additionally, ask them to explain their thoughts behind their prediction.
After predictions are made, have the students fill the inside of their pumpkin about halfway with vinegar. Add a squirt of dish soap (increases the size of the eruption) and a few drops of food coloring if you choose. Stir together the liquids and then step back to watch what happens!
Once the eruption is over, the students can repeat the experiment, try it with the lid on, or test out what happens when they add less or more of the ingredients. After cleaning up, revisit the students’ predictions and explanations for what they thought they would see. See if any students knew, otherwise teach them, that when vinegar and baking soda mix, they react to form carbon dioxide bubbles. Thus, the pumpkin erupted! Reflect on what happened with any groups who altered the ingredients.
As we continue to live in a world with the COVID-19 pandemic, the pressures of catching students up academically are ever increasing. However, nearly equally important, is letting kids re-acclimate to a school environment where they feel safe, valued, and loved. By adding fun into your school days, such as with science experiments for kids such like these, students will again find their spark and joy for learning.


